How to Remove Scratches from Tiles: Scratch Off Kit Steps for Light and Dark Tiles

Fine scratches and scuff marks on polished porcelain tiles show up most in side light, and they rarely respond to ordinary cleaning. Before you try to remove scratches from tiles, check what the tile is made of. The method below is for polished porcelain and ceramic tiles, using the Faber Scratch Off Kit. The kit is made for polished porcelain and ceramic tiles, not natural stone.
What the kit is and what is in the box
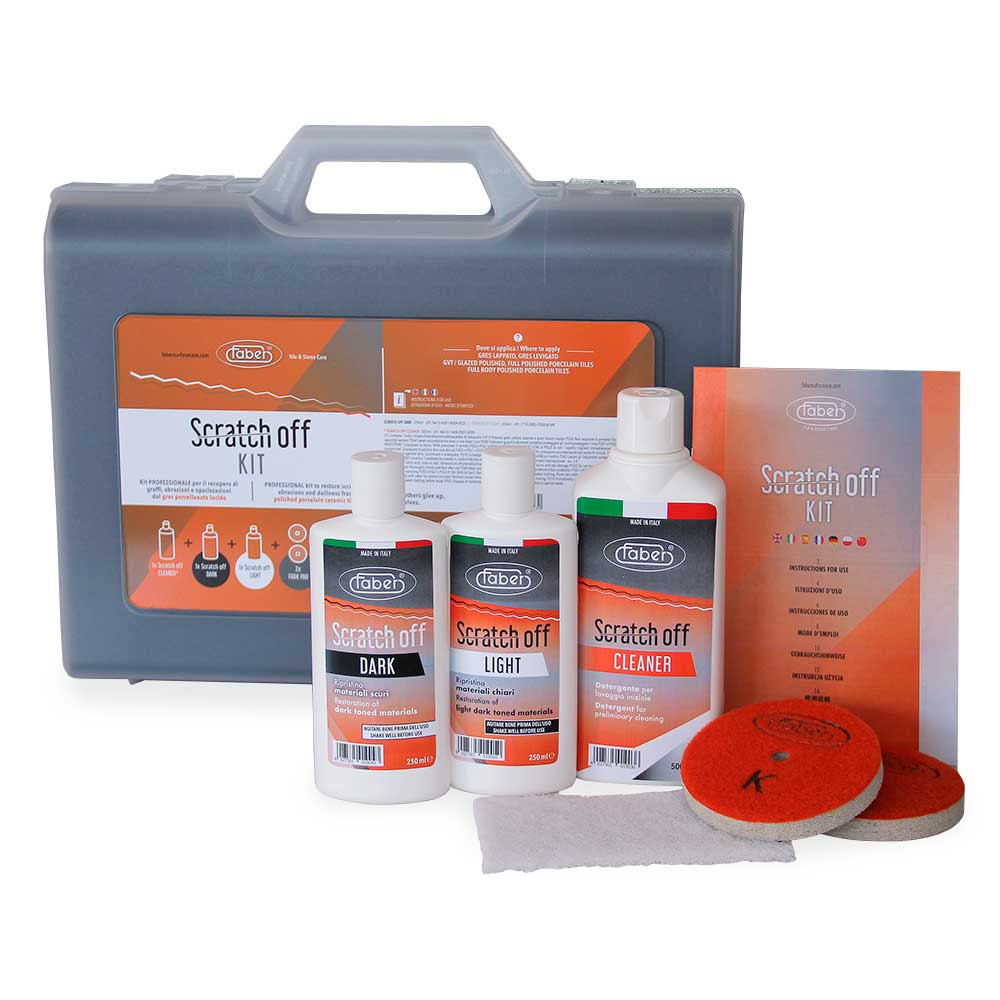
The Faber Scratch Off Kit removes surface scratches and abrasions from polished porcelain and ceramic tiles and restores the finish. It comes with separate restoration treatments for light and dark coloured tiles, so the repaired area matches the surface around it. The box contains:
- 1 x Scratch Off Cleaner, 500 ml: a concentrate that cleans the surface before the restoration treatment.
- 1 x Scratch Off Light, 250 ml: the restoration treatment for light coloured surfaces.
- 1 x Scratch Off Dark, 250 ml: the restoration treatment for dark coloured surfaces.
- 2 x FAB K pads: the specific pad used to apply the Light or Dark treatment.
- 1 x White Pad: used for the first and final cleaning of the surface.
Light or dark: choose the right treatment first
Match the treatment to the colour of the tile. Use Scratch Off Light on light coloured tiles and Scratch Off Dark on dark coloured tiles. One rule from the data sheet: do not use Scratch Off Dark on light coloured surfaces. If your floor has both light and dark tiles, treat each scratch with the product that suits the tile it sits on.
What you need besides the kit
You need an adjustable-speed hand polisher that runs at 700 to 1500 rpm, fitted with the FAB K pad. You also need masking tape and plastic film to protect the area around the scratch, plus water for rinsing and a cloth to wipe dry.
Step-by-step: removing a scratch with the Scratch Off Kit
- Clean the tile. Dilute Scratch Off Cleaner 1 part to 9 parts water for simple cleaning, or 1 part to 2 to 4 parts water for stubborn dirt. Apply with the white pad, leave it for 10 to 15 minutes, then rinse.
- Let it dry completely. Work only on a clean, dry surface.
- Mask and test. Mask the area with tape and plastic film, and test on an unexposed area first.
- Apply the treatment. Put a few drops of Scratch Off Dark or Light on the FAB K pad and spread it over the scratch with the polisher switched off.
- Buff slowly. Run the polisher at 700 to 1500 rpm, held flat with light pressure, moving in linear strokes along the scratch until the product is dry.
- Repeat. Three to five applications is typical. Deep or wide scratches need more.
- Finish. Rinse with water and the white pad, then wipe dry.
Tips to avoid mistakes
- Treat one scratch at a time.
- Do not work on a wet surface or an overheated one. If the tile gets too hot to keep a hand on, stop and let it cool.
- Keep the polisher flat and the pressure light.
- Always run the unexposed-area test before you start on a visible scratch.
Frequently asked questions
Can I use the Scratch Off Kit on marble or granite?
No. The kit is made for polished porcelain and ceramic tiles, not natural stone. For natural stone, send us a photo on WhatsApp and we will tell you what suits your surface.
How many applications does a scratch need?
Three to five applications is typical, and deep or wide scratches need more.
Do I need a machine?
Yes. The data sheet calls for an adjustable-speed hand polisher with FAB K pads, set between 700 and 1500 rpm.
Where can I read more?
More detail is in our other guides: how to remove scratches from porcelain tiles at home and repairing scratched glossy vitrified tiles. You can buy the kit here: Scratch Off Kit. The full Faber data sheet is available on the product page.